
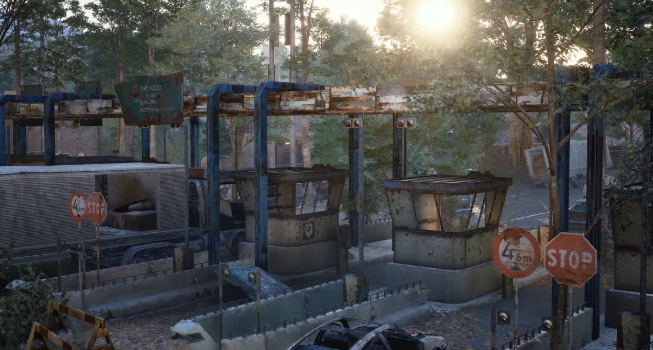
Blue Gate, ARC Raiders’ mid-tier mountainous map, is a treasure trove of high-value loot, intense PvP encounters, and hidden underground networks. Among its most critical features are the Traffic Tunnels-subterranean passages that offer stealthy movement, access to rare loot caches, and a strategic edge over both ARC forces and rival raiders.
Unlocked after 18 completed matches, Blue Gate’s dual-layer design blends open surface areas with dense underground complexes, and the Traffic Tunnels serve as the backbone of its subterranean network. Whether you’re on the “Outstanding Balance” quest or hunting for premium gear, mastering how to find these tunnels is key to surviving and thriving in this high-difficulty zone. This will help you obtain more ARC Raiders BluePrints, items, and other rewards.
First: Understand the Role of Traffic Tunnels in Blue Gate
Before diving into navigation tips, it’s essential to grasp why Traffic Tunnels matter. Unlike Blue Gate’s other underground passages, these tunnels are purpose-built for movement-connecting key surface locations like the Gate Approach Checkpoint, Pilgrim’s Peak, and Warehouse Complex.
Traffic Tunnels offer a stark contrast to Blue Gate’s open surface terrain. Their confined spaces favor close-quarters combat (CQC), while their dark, shadowy corridors let you flank enemies, evade ARC patrols, and avoid PvP hotspots. They also house hidden loot, including quest items like Dodger’s Stash, making them a must-explore for any raider.
These tunnels are part of the larger Tubes Network-a raider-built underground transport system expanded to reach Blue Gate, bearing battle scars from countless ARC and raider conflicts. Knowing their layout and entry points turns a risky raid into a strategic victory.
Key Entry Points: How to Locate Traffic Tunnel Entrances
Blue Gate’s Traffic Tunnels are not marked on the in-game map, so you’ll need to rely on environmental cues and landmark recognition to find their entrances. Below are the most reliable entry points, organized by surface location for easy navigation.
1. Central Checkpoint (Primary Entry)
The most accessible entry to the Traffic Tunnels is at Blue Gate’s Central Checkpoint-a vehicle graveyard-like area near the map’s center. Look for a set of giant metal doors flanked by rusted vehicles and ARC debris; this is the main entrance to the tunnel network.
This entrance is unguarded but often busy with other raiders, so approach cautiously. The doors are slightly ajar, emitting a faint hum and dim light-dead giveaways that you’ve found the right spot. Step through to enter the main Traffic Tunnel corridor.
2. Pilgrim’s Peak Zipline Access
For raiders approaching from the north, Pilgrim’s Peak (a towering antenna structure) offers a secondary entry to the Traffic Tunnels. Locate the zipline near the peak’s base-this zipline connects to a small tunnel that feeds directly into the Traffic Tunnels’ northwest section.
This entry is ideal for players on the “Outstanding Balance” quest, as it leads straight to the area where Dodger’s Stash is hidden. The small tunnel is narrow and dark, so keep your flashlight on and watch for ARC ambushes.
3. Warehouse Complex Maintenance Hatch
On the map’s southeast side, the Warehouse Complex (home to the Red Room puzzle) features a hidden maintenance hatch that opens into the Traffic Tunnels. Look for a rusted metal hatch near the warehouse’s back wall, marked by a yellow caution sign and loose wiring.
This entry is less crowded than the Central Checkpoint but requires solving a simple color puzzle to access the hatch. Interact with the nearby console to unlock the hatch-this also grants access to mid-tier loot caches inside the tunnel.
4. Vertical Shafts (Emergency Access)
Blue Gate’s vertical shafts-scattered across the map’s surface-offer emergency access to the Traffic Tunnels. These narrow, ladder-lined shafts connect the surface to the underground network, making them perfect for quick repositioning or escaping danger.
Look for shafts near ridgelines and forested areas; they’re marked by metal ladders and faint light from below. While these shafts don’t lead directly to the main tunnel corridor, they connect to smaller passages that feed into the Traffic Tunnels.
Environmental Cues to Avoid Getting Lost
Once inside the Traffic Tunnels, it’s easy to get disoriented-their dark, winding corridors all look similar. Use these environmental cues to stay on track and find your way to key areas.
First, follow the faint blue lights along the tunnel walls. These lights mark the main Traffic Tunnel path, leading to major loot areas and exit points. They’re dim but consistent, even in the darkest sections of the tunnels.
Second, watch for blue tarps and makeshift campsites. These are raider-made markers, often indicating nearby loot or quest items (like Dodger’s Stash, which is hidden under a blue tarp in the tunnel’s northwest corner). They also signal safe zones where you can rest and reload.
Finally, listen for ambient sounds. The Traffic Tunnels echo with the hum of distant ARC machinery and the scuttle of enemy patrols. Follow the sound of loot crates (a faint clinking) to find hidden caches, or use the echo to avoid nearby threats.
Tips for Navigating Traffic Tunnels Safely
Finding the Traffic Tunnels is only half the battle-surviving them requires strategy. Blue Gate’s tunnels are high-risk, high-reward, with ARC patrols, rival raiders, and booby traps lurking around every corner.
Prioritize Stealth Over Speed
The tunnels’ confined spaces amplify noise, so move slowly and crouch to avoid alerting enemies. Use shadows to your advantage-stay close to tunnel walls and avoid stepping on loose debris, which can give away your position.
Equip a silencer if you have one; gunfire in the tunnels echoes loudly, attracting raiders from across the network. If you encounter an ARC drone or rival, take them down quickly and quietly to avoid drawing more attention.
Bring the Right Gear
A flashlight is non-negotiable-many tunnel sections are pitch-black, and you’ll miss key cues (like blue tarps or loot crates) without it. A medkit and extra ammo are also essential, as CQC encounters can turn deadly quickly.
For players targeting high-value loot, bring a Communication Tower Key or Confiscation Room Key. These keys unlock restricted tunnel sections, including the Confiscation Room-a vault filled with epic gear and rare blueprints.
Plan Your Exit Route
Before entering the tunnels, identify your exit strategy. Note the location of vertical shafts or main entrances, so you can escape quickly if you’re ambushed. The tunnels are easy to get trapped in, so never venture too deep without a clear way out.
If you’re on a quest (like “Outstanding Balance”), mark your exit on the map before entering. This ensures you can extract quickly after collecting quest items, avoiding unnecessary risk.
Final Thoughts: Mastering Blue Gate’s Traffic Tunnels
Blue Gate’s Traffic Tunnels are more than just underground passages-they’re a strategic tool for raiders looking to outmaneuver enemies and secure top-tier loot. By using the Central Checkpoint, Pilgrim’s Peak, and Warehouse Complex entry points, you can easily find these tunnels on every raid.
Remember to follow environmental cues, prioritize stealth, and plan your route. Whether you’re completing a quest, farming loot, or evading PvP, the Traffic Tunnels offer a tactical advantage that can turn the tide of any raid. In addition, MMOEXP offers you a wider selection of cheap ARC Raiders Materials, items, and more.
With these tips, you’ll go from wandering Blue Gate’s surface to navigating its underground network like a veteran. The Traffic Tunnels may be dark and dangerous, but they’re also the key to unlocking Blue Gate’s most valuable rewards-so gear up, stay alert, and start exploring.
