Diablo 4: Drain Vitality Passive Skill Guide

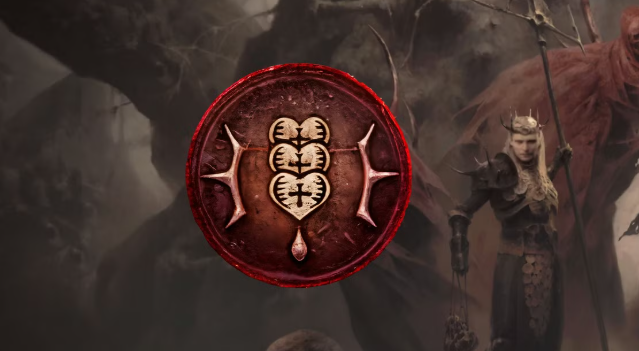
Drain Vitality is a core defensive passive skill exclusive to the Necromancer class in Diablo 4. Rooted in the Blood skill tree, this passive focuses on boosting survivability through the game’s Fortify mechanic. It serves as a key self-sustain tool for Blood-focused Necromancer builds, balancing the class’s high offensive potential with reliable damage mitigation throughout all game stages.

Unlike active skills that require essence or cooldowns, Drain Vitality works passively in the background. It synergizes exclusively with Blood-type abilities, making it a mandatory pick for players running Blood Surge, Blood Lance, or other Blood skill-centric builds. Its reliance on Lucky Hit mechanics adds strategic depth to Diablo 4 Items and skill customization.

Core Skill Mechanics

Drain Vitality’s core effect revolves around Lucky Hit procs from Blood skills. The passive grants up to a 30% Lucky Hit chance when hitting enemies with any Blood skill. A successful proc fortifies the player’s character with a shield based on their Maximum Life, a critical update introduced in Patch 1.2.0.

The Fortify value scales with skill investment. A single skill point provides 2.5% Maximum Life as Fortify per proc. Fully maxing out the skill increases this value to 7.5% Maximum Life per successful Lucky Hit. This scaling makes incremental point investments worthwhile for late-game tankiness.

Fortify acts as a protective barrier that reduces all incoming damage. When a player’s Fortify value matches their total Maximum Life, they unlock the maximum 15% damage reduction from the Fortify mechanic. Drain Vitality is one of the most consistent ways for Necromancers to maintain this buff permanently.

Optimal Skill Scaling and Point Allocation

Newer players often make the mistake of overinvesting or underutilizing Drain Vitality. For early leveling (levels 1 to 50), one or two skill points are sufficient. The lower enemy damage output makes partial Fortify uptime enough to survive regular content and dungeon runs.

For endgame builds, maxing Drain Vitality is highly recommended. Endgame activities like Nightmare Dungeons, Uber Boss fights, and the Gauntlet feature high enemy damage scaling. The boosted 7.5% Fortify per proc ensures faster Fortify stacking and consistent damage reduction during intense combat encounters.

This passive also pairs perfectly with Lucky Hit chance modifiers on gear. Stacking Lucky Hit stats significantly raises proc frequency, turning the occasional Fortify buff into a permanent defensive layer for Blood Necromancer builds.

Best Build Synergies

Drain Vitality shines brightest in Blood Surge Necromancer builds. The area-of-effect nature of Blood Surge hits multiple enemies at once, drastically increasing the number of potential Lucky Hit procs. This results in rapid Fortify stacking even when facing large monster packs.

It also complements Overpower-focused Blood builds. Fortify status not only reduces incoming damage but also amplifies Overpower damage output. This dual benefit makes Drain Vitality both a defensive and offensive utility passive for specialized endgame setups.

Minion-focused Necromancer builds gain less value from this skill. Players running skeleton or golem-centric builds often allocate fewer points here, prioritizing minion buff passives instead. Drain Vitality remains niche outside pure Blood skill builds.

Final Gameplay Tips

To maximize Drain Vitality’s effectiveness, prioritize gear with Lucky Hit Chance and Maximum Life stats. These two attributes directly boost both proc rate and Fortify strength. Pairing the passive with Fortify duration affixes further extends your damage reduction window. At the same time, supplementing your gameplay with cheap Diablo 4 materials allows you to power up more rapidly, thereby enhancing your overall gaming experience.

Avoid neglecting this passive in hardcore gameplay modes. The consistent Fortify generation it provides is irreplaceable for surviving one-shot mechanics and high-pressure endgame content. For any Blood Necromancer build, Drain Vitality is an essential foundation for unshakable survivability.

Diablo 4 Complete Sanctuary Interactive Map Guide

Exploring Sanctuary has always been one of the most important parts of Diablo 4. From hidden Altars of Lilith to Nightmare Dungeons, World Bosses, Strongholds, and Helltide events, the game’s massive open world is packed with valuable content that directly impacts progression.

Why Interactive Maps Matter in Diablo 4

Diablo 4’s world is enormous compared to previous Diablo games. Sanctuary contains multiple large regions, each filled with activities and hidden progression systems.

These regions include:

·Fractured Peaks

·Scosglen

·Dry Steppes

·Kehjistan

·Hawezar

·Nahantu

Every zone contains important objectives tied to character progression, including Renown rewards, Altars of Lilith, Strongholds, side quests, and dungeon unlocks.

Without a proper map tool, players can easily miss critical rewards that significantly improve character power. This is especially true in Season 13, where efficient farming routes heavily influence how quickly players can optimize Diablo 4 Items and progress into Torment difficulties.

Interactive maps simplify this process by tracking nearly every collectible and activity in the game world.

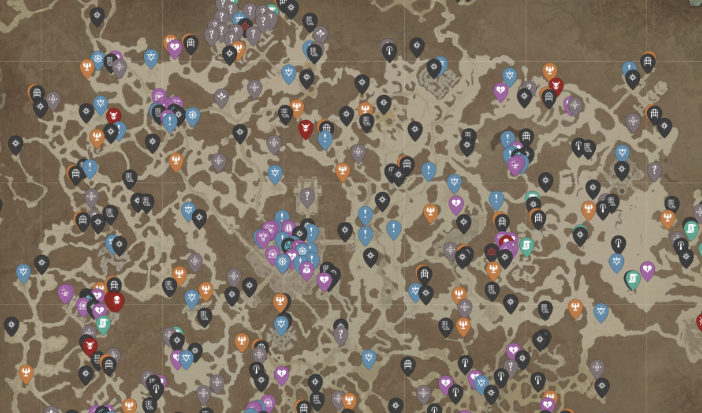
What the Diablo 4 Sanctuary Interactive Map Shows

Modern Diablo 4 interactive maps offer far more than basic navigation.

According to Game Rant’s complete Sanctuary map guide, players can use interactive tools to locate nearly every important activity and collectible in the game.

Popular map features include:

·Altars of Lilith

·Waypoints

·Dungeons

·Strongholds

·Cellars

·World Boss locations

·Helltide spawn zones

·Legion Events

·Side quests

·Rare elite enemies

·Seasonal content locations

These tools are especially valuable for players farming endgame Diablo 4 Items because efficiency becomes increasingly important at higher levels.

Altars of Lilith and Renown Farming

One of the biggest reasons players use interactive maps is to complete Altars of Lilith and Renown objectives.

Altars of Lilith provide permanent account-wide bonuses, including:

·Increased stats

·Additional Murmuring Obols

·Maximum Paragon points

·Skill points

Collecting every Altar of Lilith remains one of the most important progression steps for new seasonal characters.

Renown rewards also grant major benefits, including:

·Extra potion charges

·Skill points

·Paragon points

·Increased Obol capacity

Many players prioritize Renown completion early because these bonuses significantly improve farming efficiency later in the season.

Using Interactive Maps for Endgame Farming

Interactive maps become even more valuable during endgame progression.

Season 13’s endgame heavily revolves around efficient farming routes for:

·Helltides

·Nightmare Dungeons

·Infernal Hordes

·World Bosses

·Tormented Bosses

·Horadric events

Players farming high-end Diablo 4 Items often use interactive maps to minimize downtime between activities and maximize loot-per-hour efficiency.

Helltide Optimization

Helltides remain one of the best farming activities in Diablo 4.

Interactive maps help players locate:

·Mystery chests

·Blood Maiden events

·Tortured Gifts

·Elite enemy spawn areas

·Living Steel chests

Efficient Helltide routing dramatically improves farming speed for crafting materials, gold, and Unique Diablo 4 Items.

Nightmare Dungeon Planning

Nightmare Dungeon farming is another area where interactive maps provide major advantages.

Several community-created map tools now display:

·Dungeon layouts

·Objective locations

·Monster density

·Sigil recommendations

·Boss encounters

This allows players to target the most efficient dungeons for XP and loot farming.

World Boss and Legion Event Tracking

Interactive maps also help players track timed world events.

World Bosses remain one of the best sources of:

·High-end Diablo 4 Items

·Crafting materials

·Greater Affix gear

·Unique item drops

Meanwhile, Legion Events offers:

·Fast XP

·Obols

·Equipment

·Seasonal progression materials

Tracking event timers through interactive maps ensures players never miss valuable farming opportunities.

Nahantu and Lord of Hatred Expansion Zones

The Lord of Hatred update introduced Nahantu, a new jungle-themed region inspired by Diablo 2’s Kurast areas.

Interactive maps now help players navigate:

·Nahantu Strongholds

·Spiritborn content

·Seasonal objectives

·New dungeons

·Hidden exploration rewards

Because the region contains dense environmental design and layered pathways, map tools are especially useful for efficient exploration.

Best Interactive Map Websites

Several major websites currently offer excellent Diablo 4 interactive maps.

Map Genie

Map Genie remains one of the most popular Diablo 4 mapping tools thanks to its detailed filtering options and clean interface.

Players can track:

·Completed objectives

·Altars of Lilith

·Dungeon completion

·Seasonal activities

·Hidden collectibles

D4Builds Interactive Map

D4Builds also provides a highly detailed Sanctuary map with strong community support.

This tool is particularly useful for:

·Endgame farming routes

·Helltide tracking

·Boss spawn locations

·Seasonal events

Many players also choose to buy Diablo IV gold to accelerate progression even further by funding:

·Masterworking upgrades

·Horadric Cube crafting

·Enchanting rerolls

·Boss material purchases

·Endgame gear optimization

Combining efficient map usage with proper resource management dramatically improves progression speed.

Final Thoughts

Diablo 4’s Sanctuary is massive, and interactive maps have become one of the most important tools for efficient progression in Season 13. Whether you are hunting Altars of Lilith, farming Helltides, tracking World Bosses, or collecting endgame Diablo 4 Items, a complete interactive map can save enormous amounts of time.

Path of Exile 3.28 Starter Builds Tier List

When a fresh league begins in Path of Exile, your starter build plays a huge role in how smoothly your progression goes. The ideal choice should work well with minimal gear, level comfortably through the campaign, and transition cleanly into mapping and boss content. With the changes introduced in Patch 3.28, some builds clearly stand out as more reliable options than others.

Before getting into specific builds, it helps to understand what makes a strong league starter. The best options typically require little investment, clear the campaign quickly, handle early maps efficiently, deal solid single-target damage, and scale well into late-game content.

Top-Tier League Starters

Explosive Arrow Ballista Elementalist

This build continues to be one of the most dependable starters available. By placing ballista totems that stack explosive arrows on enemies, it delivers powerful ignite damage while keeping you at a safe distance.

High single-target damage output
Safe, totem-based playstyle
Performs well without expensive gear
Strong option for early boss farming

It’s a great pick if your goal is to tackle bosses early without risking your character.

Poisonous Concoction Pathfinder

One of the most beginner-friendly builds, Poisonous Concoction stands out because it doesn’t rely on a weapon. That makes gearing much simpler in the early stages.

No weapon required
Reliable poison damage scaling
Smooth map clearing
Strong sustain through flask mechanics

If you want a steady, low-friction start to the league, this build is hard to go wrong with.

Lightning Arrow Deadeye

Lightning Arrow is all about speed. It excels at clearing large packs quickly, making it ideal for farming currency early on.

Extremely fast clear speed
Works well with basic gear
Great for early mapping efficiency

While it doesn’t shine as much in boss fights, it’s one of the best options for fast farming.

Strong Alternatives

Boneshatter Juggernaut

For players who prefer melee builds, Boneshatter remains a solid and durable choice. Its self-damage mechanic is offset by the Juggernaut’s natural tankiness.

Very durable and forgiving
Good boss damage
Scales well with gear

It’s not the fastest clearer, but it offers excellent survivability.

Cold Damage over Time Occultist

Cold DoT builds provide a consistent and controlled playstyle, making them appealing for players who prefer a slower, safer approach.

Strong early boss damage
Reliable defenses
Smooth progression without heavy investment

This build is ideal if you value consistency over speed.

More Situational Picks

Righteous Fire Inquisitor

A fan-favorite for its simple gameplay loop, Righteous Fire is easy to use but can require more investment later on.

Straightforward mechanics
Strong sustain
Good map clearing

However, it becomes more gear-dependent in higher-tier content.

Summon Raging Spirits Guardian

Minion builds are traditionally reliable, and SRS Guardian offers a balanced mix of offense and defense.

Decent boss damage
Safe playstyle with minions
Good survivability

That said, minion AI and scaling can feel limiting compared to stronger meta builds.

Early Progression and Currency Tips

No matter which build you choose, early currency farming is key. Progressing your Atlas efficiently and focusing on mechanics like Essences, Expedition, or Harvest can significantly boost your income.

Upgrading core gear pieces—such as weapons, armor, and links—can make a noticeable difference in performance. Many players rely on trading to improve their setup quickly, especially during the early rush when demand is high.Don’t let a currency shortage hold you back—get your POE currency at MMOexp now and thrive!

Moving Into Endgame

A good starter build should eventually lead into one of three directions:

Mapping-focused setups for fast farming

Bossing builds for endgame encounters

Currency farming foundations for transitioning into a second, more expensive build

Ultimately, the best choice depends on how you like to play. Some builds focus on safety and boss damage, while others prioritize speed and efficiency. Unlock infinite possibilities by harnessing the power of cheap POE currency from MMOexp! Picking the one that matches your goals will make the early league experience much smoother.

ARC Raiders Furtive Meetings Quest Guide: Locations, Strategy, and Best Loot Farming Tips

In ARC Raiders, every successful raid comes down to preparation, precision, and knowing when to extract. Among the game’s more challenging objectives, the Furtive Meetings quest stands out as a high-risk, high-reward mission that can significantly boost your progression. If you’re aiming to farm valuable ARC Raiders Items while sharpening your survival skills, this quest is one you can’t afford to ignore.

In this complete guide, we’ll break down how the Furtive Meetings quest works, where to find all locations, and the best strategies to complete it safely.

What Is the Furtive Meetings Quest in ARC Raiders?

The Furtive Meetings quest is a multi-objective mission set in the dangerous region of Stella Montis. Like many activities in ARC Raiders, it follows the PvPvE extraction format, meaning you must survive both AI enemies and other players while completing your objectives.

To complete the quest, you must:

·Locate three hidden meeting spots

·Interact with each location

·Retrieve a key quest item

·Successfully extracted in the same run

Failing to extract means losing all progress, including your collected loot and potentially your equipped gear. This makes the mission especially punishing but equally rewarding.

All Furtive Meetings Locations Explained

The biggest challenge in this quest is locating the hidden meeting points. They are not clearly marked, which often leads to confusion and wasted time.

1. Medical Research Area (Southwest)

·Located beneath a staircase

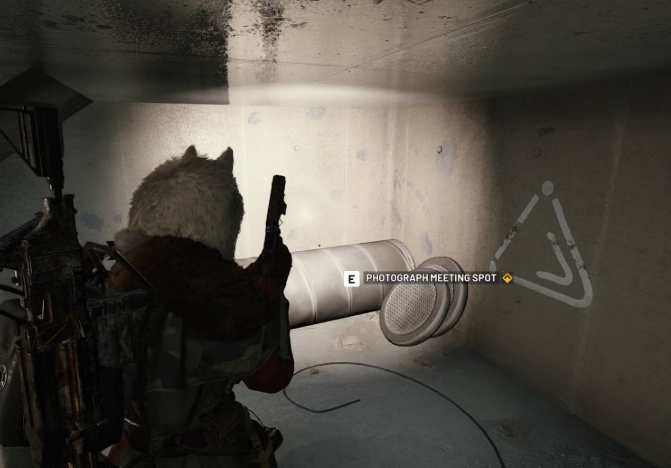
·Look for a triangular symbol on the wall

·Interact to log the meeting point

This is often the safest starting point and sets up a clean route through the rest of the map.

2. Robotic Sandbox B (Near Seed Vault)

·Found near a ventilation shaft

·Hidden inside a machinery room

·Marked by graffiti and climbable structures

This area is more contested, so approach carefully and avoid unnecessary noise.

3. Cultural Archives Staircase

·Located in a tunnel near the Seed Vault

·The final objective includes loading a container

·Contains the “Secret Meeting Info” quest item

Once you collect this item, your objective shifts immediately to extraction.

Why This Quest Matters for ARC Raiders Items

Let’s be clear-the Furtive Meetings quest is one of the most efficient ways to earn high-tier ARC Raiders Items.

Upon completion, players can receive:

·A powerful Legendary weapon (Aphelion)

·Valuable crafting resources

·High-tier loot for future upgrades

Unlike random farming runs, this quest provides consistent and guaranteed rewards, making it ideal for players who want to progress faster without relying entirely on RNG.

Best Strategy to Complete Furtive Meetings Safely

Many players fail this quest because they treat it like a standard loot run. That approach doesn’t work here. Success requires discipline and planning.

1. Use a Lightweight Loadout

Bring only essential gear:

·Short-range weapons for tight interiors

·Minimal equipment to reduce risk

·A secure inventory slot for the quest item

Mobility is more important than firepower in Stella Montis.

2. Prioritize Route Efficiency

Planning your route before deployment is critical:

·Start at Medical Research

·Move to Robotic Sandbox B

·Finish at Cultural Archives

This linear path reduces backtracking and limits your exposure to danger.

3. Avoid Unnecessary Fights

Stella Montis is a PvP hotspot. Engaging every enemy is a mistake.

·Avoid gunfights when possible

·Use stealth and environmental cover

·Focus only on completing objectives

Every unnecessary fight increases your chances of failure.

4. Extract Immediately After Completion

This is where most players fail.

Once you obtain the Secret Meeting Info, your mission is complete-but only if you extract successfully.

·Do not linger for extra loot

·Avoid high-traffic zones

·Head straight to extraction

Greed is the number one cause of failure in this quest.

How This Quest Supports Blueprint Progression

Blueprints are essential for crafting advanced gear and improving your long-term performance. While this quest doesn’t directly guarantee blueprint drops, it plays a major role in progression.

By completing Furtive Meetings, you can:

·Earn high-value loot to trade or use

·Improve your overall farming efficiency

·Increase your survivability in tougher raids

Some players choose to buy ARC Raiders Blueprints to accelerate their progress. However, consistently completing quests like this can reduce that need by providing steady resources and better gear opportunities.

Risk vs Reward: Is It Worth It?

There’s no denying the difficulty of this mission:

·All objectives must be completed in one run

·The map layout is complex

·PvP encounters are frequent

However, the rewards far outweigh the risks.

Compared to standard farming:

·Higher guaranteed loot value

·Faster progression speed

·Better access to high-tier equipment

For players serious about collecting ARC Raiders Items, this quest is one of the most efficient methods available.

Common Mistakes to Avoid

Even experienced players can struggle with Furtive Meetings. Avoid these common pitfalls:

·Poor route planning: Leads to wasted time and increased exposure

·Over-engaging enemies: Drains resources and raises risk

·Over-looting: Delays extraction and increases chances of death

·Weak preparation: Inadequate gear reduces survivability

Learning from these mistakes will dramatically improve your success rate.

Final Thoughts

The Furtive Meetings quest perfectly captures what makes ARC Raiders so engaging: high stakes, meaningful rewards, and the constant tension of risk versus reward.

If you want to succeed:

·Learn the map and plan your route carefully

·Keep your loadout light and efficient

·Focus on objectives, not combat

·Extract as soon as the mission is complete

Whether you’re farming valuable ARC Raiders Items or looking for ways to buy ARC Raiders Blueprints to enhance your gear, mastering this quest will give you a clear advantage.

In ARC Raiders, survival isn’t about brute force-it’s about smart decisions. And in Furtive Meetings, every decision counts.

ARC Raiders: How to Find Traffic Tunnels in Blue Gate

Blue Gate, ARC Raiders’ mid-tier mountainous map, is a treasure trove of high-value loot, intense PvP encounters, and hidden underground networks. Among its most critical features are the Traffic Tunnels-subterranean passages that offer stealthy movement, access to rare loot caches, and a strategic edge over both ARC forces and rival raiders.

Unlocked after 18 completed matches, Blue Gate’s dual-layer design blends open surface areas with dense underground complexes, and the Traffic Tunnels serve as the backbone of its subterranean network. Whether you’re on the “Outstanding Balance” quest or hunting for premium gear, mastering how to find these tunnels is key to surviving and thriving in this high-difficulty zone. This will help you obtain more ARC Raiders BluePrints, items, and other rewards.

First: Understand the Role of Traffic Tunnels in Blue Gate

Before diving into navigation tips, it’s essential to grasp why Traffic Tunnels matter. Unlike Blue Gate’s other underground passages, these tunnels are purpose-built for movement-connecting key surface locations like the Gate Approach Checkpoint, Pilgrim’s Peak, and Warehouse Complex.

Traffic Tunnels offer a stark contrast to Blue Gate’s open surface terrain. Their confined spaces favor close-quarters combat (CQC), while their dark, shadowy corridors let you flank enemies, evade ARC patrols, and avoid PvP hotspots. They also house hidden loot, including quest items like Dodger’s Stash, making them a must-explore for any raider.

These tunnels are part of the larger Tubes Network-a raider-built underground transport system expanded to reach Blue Gate, bearing battle scars from countless ARC and raider conflicts. Knowing their layout and entry points turns a risky raid into a strategic victory.

Key Entry Points: How to Locate Traffic Tunnel Entrances

Blue Gate’s Traffic Tunnels are not marked on the in-game map, so you’ll need to rely on environmental cues and landmark recognition to find their entrances. Below are the most reliable entry points, organized by surface location for easy navigation.

1. Central Checkpoint (Primary Entry)

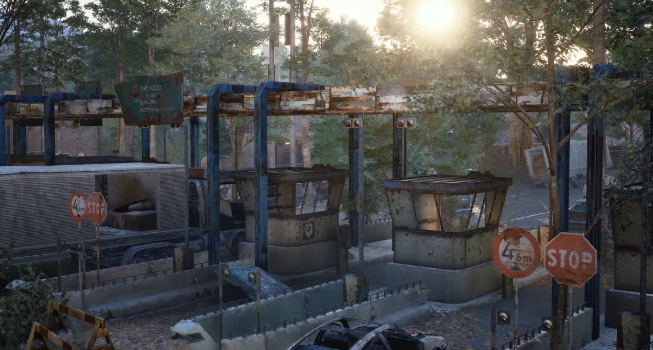
The most accessible entry to the Traffic Tunnels is at Blue Gate’s Central Checkpoint-a vehicle graveyard-like area near the map’s center. Look for a set of giant metal doors flanked by rusted vehicles and ARC debris; this is the main entrance to the tunnel network.

This entrance is unguarded but often busy with other raiders, so approach cautiously. The doors are slightly ajar, emitting a faint hum and dim light-dead giveaways that you’ve found the right spot. Step through to enter the main Traffic Tunnel corridor.

2. Pilgrim’s Peak Zipline Access

For raiders approaching from the north, Pilgrim’s Peak (a towering antenna structure) offers a secondary entry to the Traffic Tunnels. Locate the zipline near the peak’s base-this zipline connects to a small tunnel that feeds directly into the Traffic Tunnels’ northwest section.

This entry is ideal for players on the “Outstanding Balance” quest, as it leads straight to the area where Dodger’s Stash is hidden. The small tunnel is narrow and dark, so keep your flashlight on and watch for ARC ambushes.

3. Warehouse Complex Maintenance Hatch

On the map’s southeast side, the Warehouse Complex (home to the Red Room puzzle) features a hidden maintenance hatch that opens into the Traffic Tunnels. Look for a rusted metal hatch near the warehouse’s back wall, marked by a yellow caution sign and loose wiring.

This entry is less crowded than the Central Checkpoint but requires solving a simple color puzzle to access the hatch. Interact with the nearby console to unlock the hatch-this also grants access to mid-tier loot caches inside the tunnel.

4. Vertical Shafts (Emergency Access)

Blue Gate’s vertical shafts-scattered across the map’s surface-offer emergency access to the Traffic Tunnels. These narrow, ladder-lined shafts connect the surface to the underground network, making them perfect for quick repositioning or escaping danger.

Look for shafts near ridgelines and forested areas; they’re marked by metal ladders and faint light from below. While these shafts don’t lead directly to the main tunnel corridor, they connect to smaller passages that feed into the Traffic Tunnels.

Environmental Cues to Avoid Getting Lost

Once inside the Traffic Tunnels, it’s easy to get disoriented-their dark, winding corridors all look similar. Use these environmental cues to stay on track and find your way to key areas.

First, follow the faint blue lights along the tunnel walls. These lights mark the main Traffic Tunnel path, leading to major loot areas and exit points. They’re dim but consistent, even in the darkest sections of the tunnels.

Second, watch for blue tarps and makeshift campsites. These are raider-made markers, often indicating nearby loot or quest items (like Dodger’s Stash, which is hidden under a blue tarp in the tunnel’s northwest corner). They also signal safe zones where you can rest and reload.

Finally, listen for ambient sounds. The Traffic Tunnels echo with the hum of distant ARC machinery and the scuttle of enemy patrols. Follow the sound of loot crates (a faint clinking) to find hidden caches, or use the echo to avoid nearby threats.

Tips for Navigating Traffic Tunnels Safely

Finding the Traffic Tunnels is only half the battle-surviving them requires strategy. Blue Gate’s tunnels are high-risk, high-reward, with ARC patrols, rival raiders, and booby traps lurking around every corner.

Prioritize Stealth Over Speed

The tunnels’ confined spaces amplify noise, so move slowly and crouch to avoid alerting enemies. Use shadows to your advantage-stay close to tunnel walls and avoid stepping on loose debris, which can give away your position.

Equip a silencer if you have one; gunfire in the tunnels echoes loudly, attracting raiders from across the network. If you encounter an ARC drone or rival, take them down quickly and quietly to avoid drawing more attention.

Bring the Right Gear

A flashlight is non-negotiable-many tunnel sections are pitch-black, and you’ll miss key cues (like blue tarps or loot crates) without it. A medkit and extra ammo are also essential, as CQC encounters can turn deadly quickly.

For players targeting high-value loot, bring a Communication Tower Key or Confiscation Room Key. These keys unlock restricted tunnel sections, including the Confiscation Room-a vault filled with epic gear and rare blueprints.

Plan Your Exit Route

Before entering the tunnels, identify your exit strategy. Note the location of vertical shafts or main entrances, so you can escape quickly if you’re ambushed. The tunnels are easy to get trapped in, so never venture too deep without a clear way out.

If you’re on a quest (like “Outstanding Balance”), mark your exit on the map before entering. This ensures you can extract quickly after collecting quest items, avoiding unnecessary risk.

Final Thoughts: Mastering Blue Gate’s Traffic Tunnels

Blue Gate’s Traffic Tunnels are more than just underground passages-they’re a strategic tool for raiders looking to outmaneuver enemies and secure top-tier loot. By using the Central Checkpoint, Pilgrim’s Peak, and Warehouse Complex entry points, you can easily find these tunnels on every raid.

Remember to follow environmental cues, prioritize stealth, and plan your route. Whether you’re completing a quest, farming loot, or evading PvP, the Traffic Tunnels offer a tactical advantage that can turn the tide of any raid. In addition, MMOEXP offers you a wider selection of cheap ARC Raiders Materials, items, and more.

With these tips, you’ll go from wandering Blue Gate’s surface to navigating its underground network like a veteran. The Traffic Tunnels may be dark and dangerous, but they’re also the key to unlocking Blue Gate’s most valuable rewards-so gear up, stay alert, and start exploring.